Getting Started with LeadVibe
In the next 10 minutes, you'll have lead scoring rules running and your first alert configured. By tomorrow, you'll see which prospects are showing real buying intent.
Step 1: Create Your Account
- Go to platform.leadvibe.app
- Click Sign Up and follow the prompts
- Verify your email to activate your account
Already have an account? Click Log In. Forgot your password? Use Reset Password.
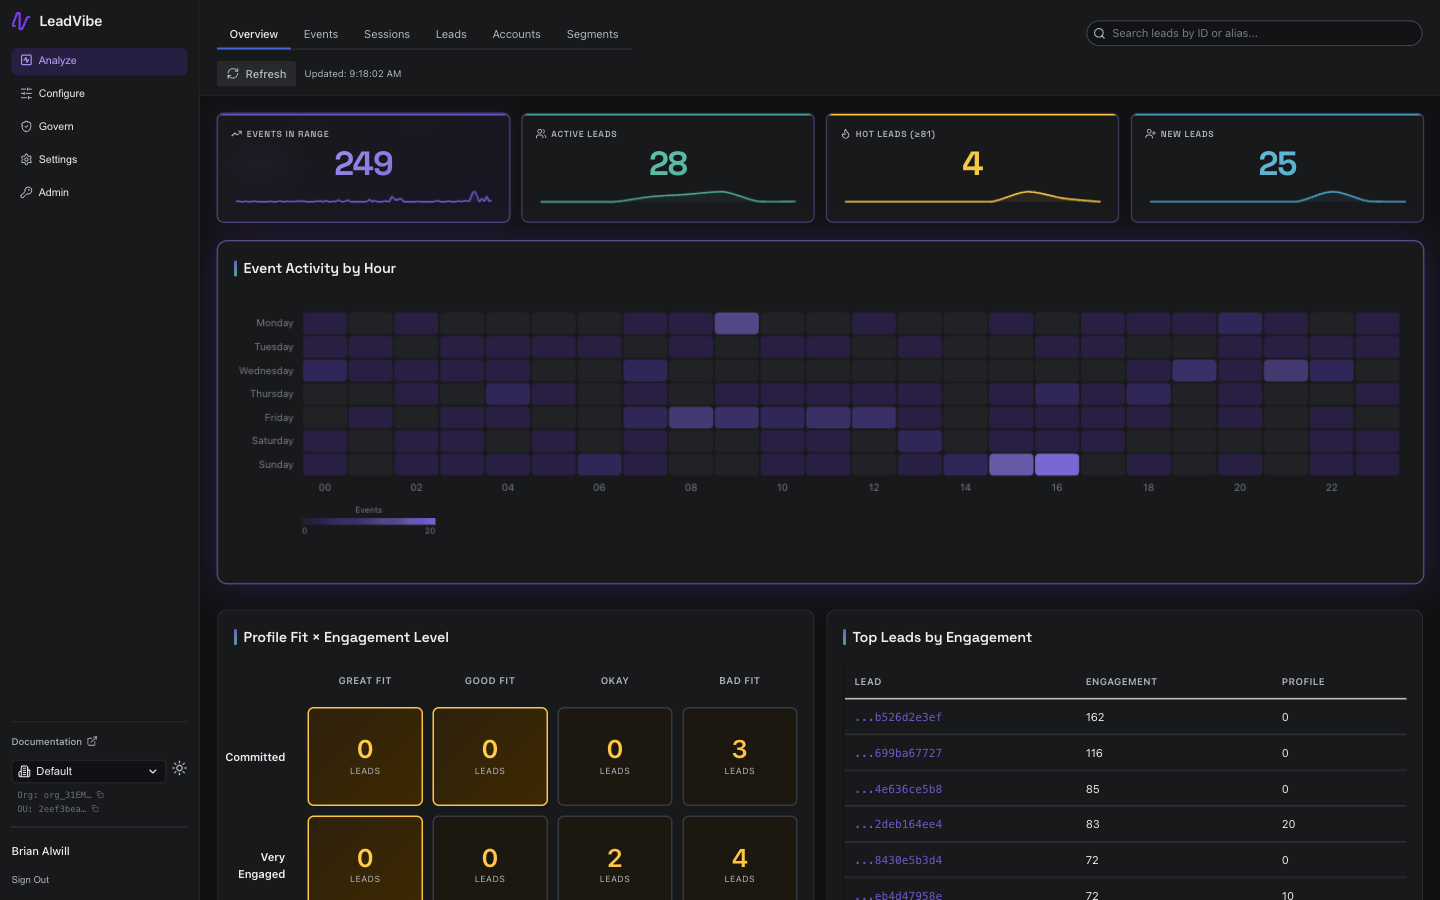
Step 2: Explore Your Dashboard
After signing in, you'll land on your dashboard. Here's what you're looking at:
Lead Scores - See who's most engaged right now, ranked by points
Recent Activity - The latest events from your leads (email opens, page views, etc.)
Quick Actions - Shortcuts to import events, add leads, or view reports
What this means for you: One glance tells you which leads deserve your attention today.

Step 3: Understand Where Things Live
Leads - Search for people, view their activity timeline, and see their current score
Events - Browse all captured activity. Filter by event type, date range, or specific lead.
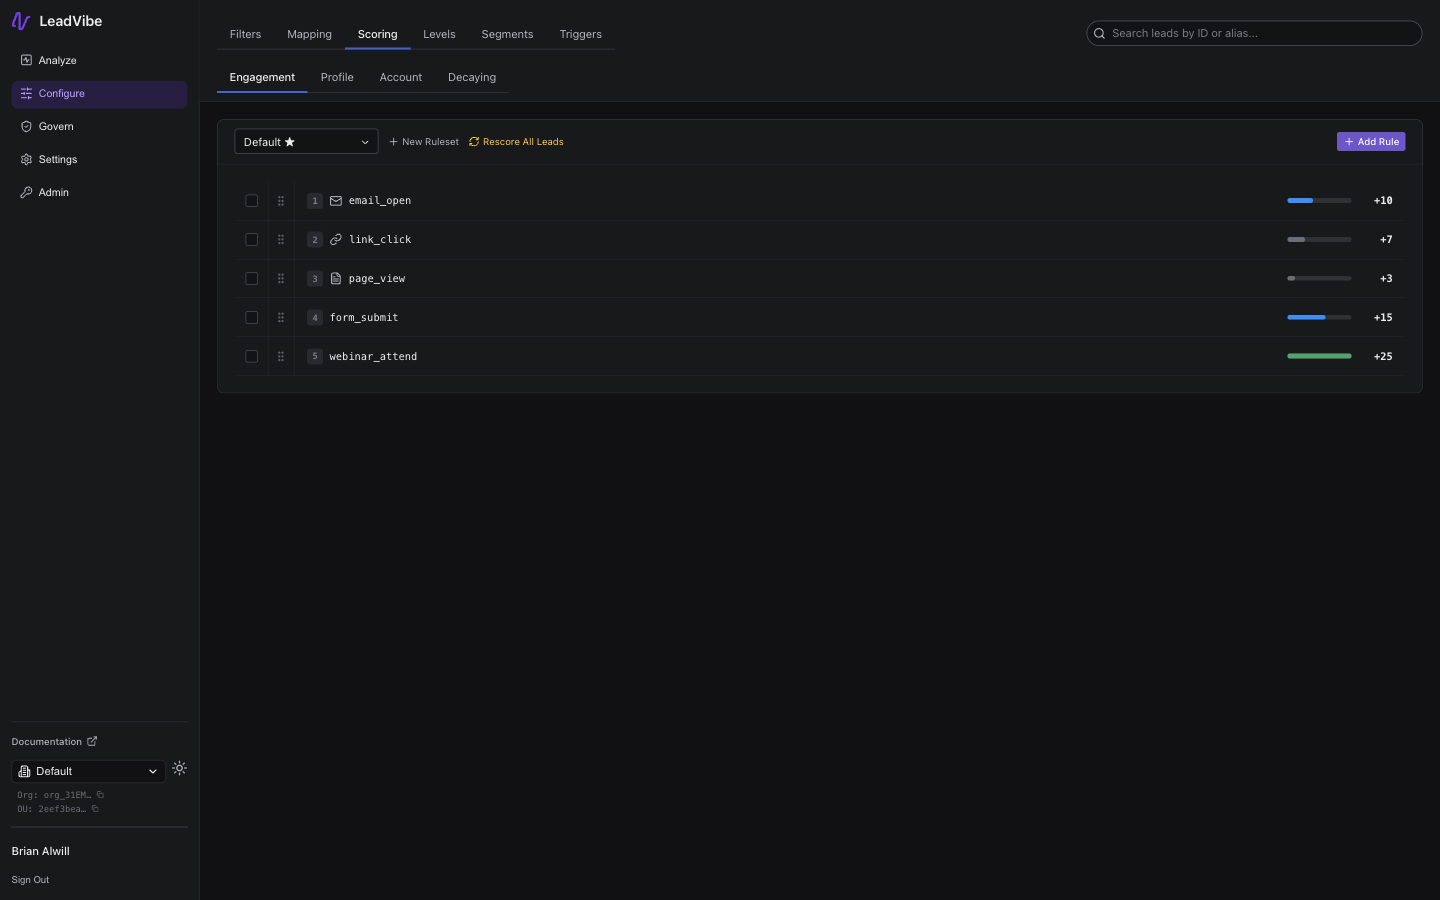
Configure - Build the scoring logic that turns activity into points (this is where the magic happens)
Settings - Manage your profile, invite team members, connect integrations, and generate API keys
Step 4: Build Your First Scoring Model
This is the core of LeadVibe. Follow these four steps:
1. Pick Your Key Activities
Think about which actions signal real interest. Common examples:
- Email open
- Pricing page view
- Demo request
- Free trial signup
- Webinar attendance
Start small: Pick 3-5 event types that matter most to your sales team.
2. Add Scoring Rules
Assign point values that reflect business impact:
- Low intent: Email open = 5 points
- Medium intent: Page view = 10 points
- High intent: Form submission = 20 points
- Very high intent: Demo request = 50 points
Go to: Configure → Rulesets → Create Ruleset → Add Rules

Quick Start Option: LeadVibe's Quick Start wizard can generate a complete scoring configuration in minutes based on your industry. It creates scoring rules, levels, filters, segments, and triggers all at once. Available industry templates include:
- SaaS Scoring - Demo requests, trial signups, pricing page engagement
- Product-Led Growth - Feature activation, team invitations, upgrades
- Content Marketing - Blog engagement, webinar attendance, resource downloads
- Enterprise ABM - Decision-maker titles, company size, industry targeting
Navigate to Configure > Quick Start to launch the wizard, or build rules manually below.
What success looks like: Your first ruleset with 3-5 rules (either from a template or custom-built), each tied to a meaningful action.
3. Set Up Your First Alert
Now make your scoring actionable. Create a trigger that notifies sales when a lead gets hot:
Example: Alert #sales-hot-leads in Slack when a lead reaches 50 points
Go to: Configure → Milestone Triggers → Create Trigger
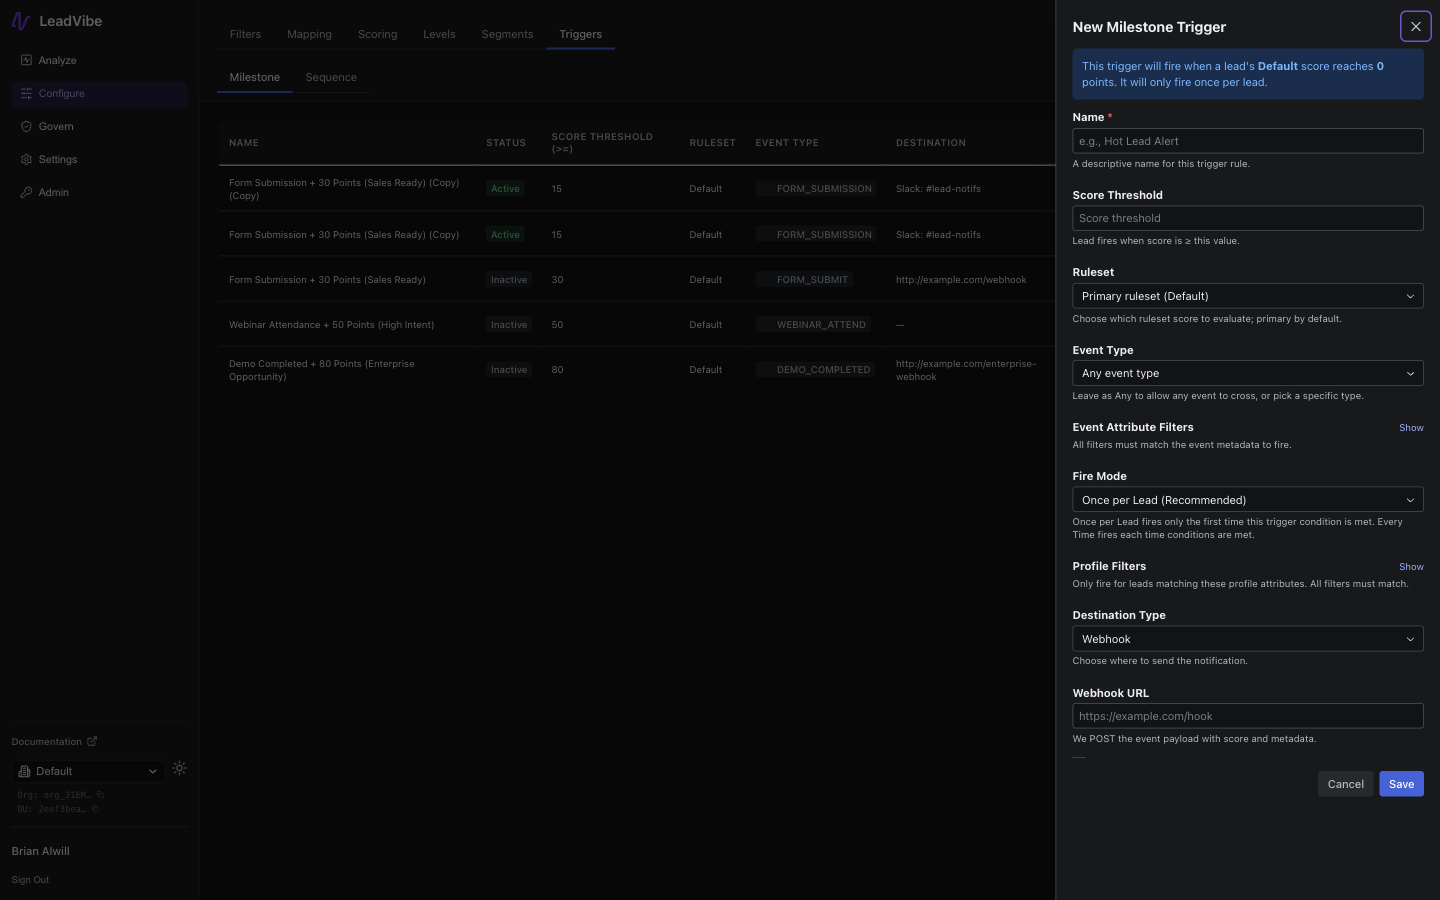
What success looks like: Your first trigger configured and active. When a lead crosses 50 points, your team gets notified automatically.
4. Import Sample Events (Optional)
Want to see scoring in action immediately? Upload a small batch of past events:
Go to: Leads → Import → Upload CSV
Pro tip: Start with 10-20 sample events from your best leads. Watch how their scores stack up. If the numbers feel wrong, adjust your rules before importing more data.
What Success Looks Like
After your first 10 minutes, you should have:
- ✅ Account created and verified
- ✅ One ruleset with 3-5 scoring rules
- ��✅ At least one milestone trigger configured
- ✅ (Optional) Sample events imported to test scoring
Within 24 hours, you should see:
- Lead scores updating in real-time as new events arrive
- Your first "hot lead" alert firing when someone crosses your threshold
- A clear view of which prospects are most engaged
Within one week, you'll know:
- Whether your point values reflect real lead quality
- Which event types matter most for your business
- How to adjust rules to fine-tune your scoring model
Key Concepts to Understand
Leads vs. Accounts
- Lead = A person (e.g., jane@example.com)
- Account = A company (e.g., Example Corp)
- For now, you're working with leads. Account-based features arrive in Phase 2 when ABM is enabled.
Event Types
Labels for activities like email_open, page_view, form_submit. You define what matters, and LeadVibe tracks it.
Lead Scoring Points accumulate when leads engage. Optionally, scores can decay over time when leads go quiet, keeping your data fresh.
Triggers Automated actions that fire when conditions are met:
- Milestone Triggers: Fire when a lead crosses a score threshold
- Sequence Triggers: Fire when a lead completes a specific series of actions
Need Help?
In the Docs You're here—browse topics anytime. The sidebar has everything from API details to integration guides.
In the App Open the Help menu to contact support, report issues, or request features.
Integration Guides See Integrations to connect HubSpot, Slack, Teams, AI assistants, and more.
API Reference Developers can dive into API Routes for complete endpoint documentation.
Pro Tips for Your First Week
Start Simple Add 3-5 rules. Watch how scores behave for a week. Adjust point values based on what you learn. Don't overcomplicate it on day one.
Involve Sales Early Ask your sales team: "Which leads have been easiest to close?" Look for patterns in their engagement. Build rules around those signals.
Test with Real Data Import 100-200 events from your best and worst leads. If your best leads don't score high, your rules need tweaking.
Set Conservative Thresholds Start with a higher trigger threshold (like 75 points) and lower it once you're confident in your scoring model. Better to miss a few early alerts than flood sales with false positives.
Document Your Decisions Add notes when you create rules explaining why each activity is worth its points. Future you will thank you.
Next Steps
- Build Advanced Scoring → - Learn about rulesets, decay rules, and sequence triggers
- Connect Your Tools → - Sync with HubSpot, set up Slack alerts, or connect AI assistants
- Import Leads in Bulk → - Upload historical data or sync from your CRM
Ready to get strategic? Check out Configure to master the system.